
Coffee Brewing Guide for Beginners: Clear Steps, Equipment Tips, and Common Mistakes
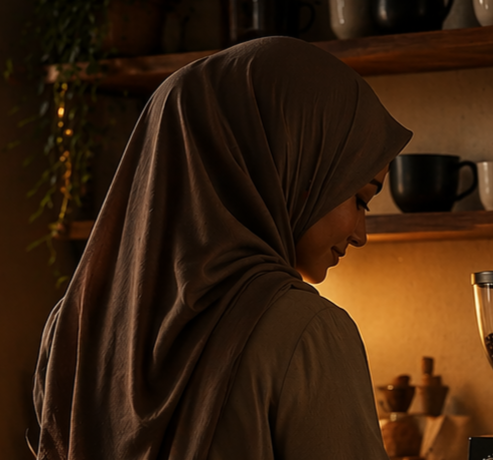
You can make great coffee at home without fancy gear or confusing steps. Start by learning three things that matter most: the right grind, a simple coffee-to-water ratio, and water temperature—master these and your morning cup will improve fast. Obon, a coffee expert, agrees that understanding these basics saves time and helps you taste what good coffee can be.
This guide walks you through essentials like equipment, popular brew methods, measurements, cleaning, and troubleshooting so you can brew confidently. Follow the simple tips and small experiments here to find a routine that fits your taste and schedule.
Essentials of Coffee Brewing
Good coffee starts with three practical decisions: what beans you buy, the tools you use, and how you grind them. Make choices that match your taste, budget, and daily routine to get consistent results.
Selecting Coffee Beans
Choose freshly roasted whole beans whenever possible. Look for a roast date on the bag and use beans within 2–4 weeks of that date for best flavor. If you prefer brighter, fruity notes, pick light to medium roasts from single origins like Ethiopia or Kenya. For richer, chocolatey, or nutty flavors, choose medium-dark roasts or blends from Central or South America.
Decide between single origin and blend based on consistency. Single origins highlight a region’s flavor; blends balance acidity, body, and sweetness. Buy 250 g–1 lb bags so beans stay fresh after opening. Store beans in a cool, dark place in an airtight container; avoid the fridge or freezer for daily-use beans.
Choosing the Right Equipment
Start with equipment that matches how you like to brew and how much time you have. For quick, hands-off coffee, get a good drip machine with a flat-bottom filter. If you want control and clarity, choose a pour-over cone (V60 or Chemex) and a gooseneck kettle. For full-bodied coffee, use a French press with a coarse metal filter. If you plan to make espresso, invest in an espresso machine and a reliable tamper.
Essentials to buy first: a burr grinder, a scale that measures grams, and a thermometer or a kettle with temperature control. A burr grinder gives uniform grind size; a scale lets you follow precise coffee-to-water ratios. You don’t need the most expensive model—aim for reliability and ease of cleaning.
Understanding Grind Size
Grind size controls extraction speed and final taste. Use a coarse grind (looks like sea salt) for French press and cold brew. Use a medium grind (similar to sand) for most drip machines and some pour-over cones. Use a fine grind (like table salt) for espresso. If the grind is too coarse, your coffee will taste weak and sour. If it’s too fine, your coffee will taste bitter and over-extracted.
Adjust grind in small steps until your brew tastes balanced. When changing brewing method, change grind size first before adjusting dose or time. Keep notes: record grind setting, grams of coffee, grams of water, and brew time so you can repeat what works.
Popular Brewing Methods
These methods cover common home options that balance ease, control, and flavor. You’ll learn how each one extracts coffee, what grind and ratio to use, and the main pros and cons for daily brewing.
Drip Coffee
Drip machines pour hot water over a paper or metal filter with medium-ground coffee. Use a 1:15–1:17 coffee-to-water ratio (for example, 20 g coffee to 300 g water) and a medium grind similar to granulated sugar. Freshly ground beans and filtered water make the biggest difference in taste.
Benefits: automatic brewing, consistent temperature, and easy cleanup with disposable filters. Limits: less control over pour rate and bloom, and paper filters trap oils that change body and flavor. If your machine has a showerhead, rinse the filter with hot water first to stabilize temperature.
For better results, weigh your coffee and water, grind right before brewing, and clean the machine regularly to avoid stale oil buildup.
French Press
French press uses full immersion and a metal mesh filter to produce a full-bodied cup. Use a coarser grind, about sea salt texture, and a typical ratio of 1:12–1:15 (for stronger coffee, use lower ratio). Pour hot water (just off boil, ~94°C/200°F), stir, steep 4 minutes, then press slowly.
Benefits: richer mouthfeel and more oils in the cup, simple equipment, and good for multiple servings. Limits: sediment in the cup and slightly higher bitterness if over-extracted. To reduce grit, let grounds settle for 30–60 seconds before pressing, and pour immediately after pressing to avoid over-extraction.
Clean the plunger and mesh well after each use to prevent buildup and sour flavors.
Pour Over
Pour over gives you fine control over flow rate, contact time, and extraction. Use a medium-fine grind (between drip and espresso) and a common ratio of 1:15–1:17. Start with a 30–45 second bloom using twice the coffee weight in water, then pour in slow concentric circles to reach your target weight in 2:30–3:30 minutes total.
Benefits: bright, clean cup and precise control over strength and clarity. Limits: requires practice, a gooseneck kettle for best control, and more hands-on time. Use a paper filter for clarity or a cloth/metal filter to keep more oils.
Key tips: pre-wet the filter, keep water temperature around 92–96°C (197–205°F), and use a scale and timer for repeatable results.
Water and Measurements
You need the right coffee, water, and temperature to get the flavor you want. Measure coffee by weight, use clean water, and heat it to the right range.
Coffee-to-Water Ratio
Use grams for accuracy. A good starting range is 1:15 to 1:17 (1 gram coffee : 15–17 grams water). For a stronger cup, try 1:15. For a milder cup, try 1:17.
If you brew a single 12-oz (360 g) cup, weigh 21–24 g of coffee (360 ÷ 17 ≈ 21, 360 ÷ 15 = 24). For a French press or pour-over, adjust by 1–2 g until the taste matches what you like.
Tips:
- Use a digital scale that reads grams.
- Keep grind size consistent; changing grind affects extraction and may require ratio tweaks.
- For espresso, use much tighter ratios (e.g., 1:2 brew ratio for espresso shots), not the 1:15–1:17 range.
Water Temperature
Aim for 195–205°F (90–96°C) at the moment the water contacts the grounds. This range extracts flavors without burning the coffee.
If you boil water, let it sit 30–45 seconds before pouring to cool into range. For delicate light roasts, use the upper half (about 200–205°F). For darker roasts, use the lower half (about 195–200°F).
Use a thermometer or an electric kettle with temperature control for consistency. Avoid using boiling water straight from the kettle; it can over-extract and taste bitter.
Water Quality
Your water should taste neutral and be free of strong odors. Aim for low mineral content but not distilled water.
Ideal tap water has some minerals (calcium, magnesium) that help extraction. If your tap water tastes off, use filtered or bottled water with balanced mineral content. Avoid very hard water — it can make coffee taste flat — and avoid distilled water — it extracts poorly and yields a dull cup.
Quick checklist:
- Smell the water first.
- If water tastes metallic, use a filter.
- If you use bottled water, check the label for mineral content; look for moderate total dissolved solids (TDS).
Brewing Techniques for Beginners
Start with fresh, evenly ground beans and water heated to about 195–205°F (90–96°C). Pay attention to timing and slow, steady pouring to control flavor and strength.
Blooming Process
Blooming wakes the coffee and releases trapped gases for a cleaner cup. Use about twice the weight of water to coffee: for 20 g coffee, pour 40–50 g water. Start a timer and pour gently to wet all grounds within 10 seconds.
Let the coffee sit for 30–45 seconds after the bloom pour. You’ll see bubbles and expansion; that’s normal. If you skip this step, extraction will be uneven and your coffee may taste sour or flat.
For larger batches, stir lightly after the bloom to break any dry pockets. Adjust bloom time slightly for very fresh beans (longer) or older beans (shorter).
Pouring Techniques
Control pour speed and pattern to manage extraction. Use a gooseneck kettle for steady flow and aim for a circular motion from the center outward, avoiding the edges of the filter. Keep the spout 1–2 inches above the bed of grounds.
Use pulse pours for medium-fine grinds: pour in stages (e.g., 60 g, then 100 g, then remaining) with 20–30 second gaps. Use continuous slow pour for coarser grinds like French press or cold brew.
Watch total brew time: pour-over methods usually finish in 2:30–3:30 minutes. If the brew finishes too fast, grind finer or pour slower. If it’s too slow, grind coarser or pour a bit faster.
Cleaning and Maintaining Equipment
Keep removable parts rinsed after use, wipe surfaces that touch coffee, and remove grounds and oils regularly to prevent stale flavors and clogs.
Daily Cleaning Tips
Clean these items every day for best flavor: portafilter, filter basket, drip-brew basket, French press plunger, and any removable water-reservoir lids. Rinse with hot water and use a soft brush to remove oils and trapped grounds.
Wipe steam wands after each use and purge steam briefly into the drip tray. For grinders, brush out the hopper and doser to clear fines; avoid water on burrs. Dry parts fully before reassembly to stop mold.
Keep a simple kit: soft brush, dish soap, microfiber cloth, and a narrow bottle brush. Run a short brew cycle with plain water through automatic machines after cleaning to flush residues.
Descaling Methods
Descale machines when you see scale buildup or every 1–3 months depending on water hardness. Use a commercial descaler or a 1:1 mix of white vinegar and water for most home drip and single-serve machines.
Follow the manufacturer steps: fill the reservoir, run a full cycle, let the solution sit 15–30 minutes if recommended, then run two full cycles with fresh water to rinse. For espresso machines, use a descaler made for espresso systems and follow espresso-specific instructions to protect valves and seals.
For kettles and boilers, heat a descaling solution, let it cool, scrub with a soft brush, rinse thoroughly, and dry. Record dates in a small log so you descale at consistent intervals.
Storing Coffee for Freshness
Store beans or grounds in an airtight, opaque container in a cool, dry spot. Buy only what you’ll use within 2–3 weeks and keep coffee away from heat, light, moisture, and strong odors.
Optimal Storage Containers
Choose an airtight container with a one-way valve if you buy whole-bean coffee and plan to keep it for more than a few days. The valve lets CO2 escape without letting air in. Look for containers made of stainless steel or opaque ceramic to block light.
If you use pre-ground coffee, store it in the same kind of airtight jar and plan to use it faster—within a few days is best. Avoid clear glass jars on a sunny counter and thin plastic bags that let air pass through.
Small containers are better than large bins. Transfer only the amount you’ll use in a week to a daily-use jar and keep the rest sealed in its original bag or container.
Best Practices for Longevity
Keep coffee at room temperature; don’t refrigerate it. Fridge moisture and food odors degrade flavor quickly. Only freeze beans if you bought a large amount you can’t use within a month, and freeze in small, airtight portions.
When using frozen beans, thaw a portion fully before opening to avoid condensation. Use a scale and grind right before brewing to preserve oils and aroma. Label containers with roast date and use-by date (2–3 weeks after opening for whole beans, 1 week for grounds).
Experimenting and Perfecting Your Brew
You will change a few clear variables and taste carefully to find what you like. Small, single changes let you learn which factor affects strength, sweetness, and bitterness.
Adjusting Brew Variables
Focus on these main variables: grind size, coffee-to-water ratio, water temperature, and brew time. Change only one at a time so you can tell what moved the flavor.
- Grind size: finer grinds extract faster and make stronger, sometimes bitter coffee. Coarser grinds extract slower and can taste weak or sour.
- Ratio: try 1:15 (strong) and 1:17 (milder). For 15 g coffee, use 225–255 g water to experiment across that range.
- Temperature: aim for 90–96°C (195–205°F). Lower temps highlight brightness; higher temps increase body and extraction.
- Time: vary immersion or contact time by 10–30 seconds for pour-over, or 10–30 seconds for AeroPress recipes. Longer time pulls more soluble flavors.
Record each change. Use a notebook or a phone note: date, grind setting, grams, temp, and time. Repeat a brew after a single change to confirm the effect.
Tasting and Evaluating Coffee
Sip small, let the coffee cool a bit, and note three things: strength, acidity (brightness), and balance. Describe what you taste in simple words like “sweet,” “sour,” “bitter,” or “clean.”
Use this quick tasting checklist:
- Strength: too weak / just right / too strong.
- Acidity: low / medium / high (sharp vs. juicy).
- Bitterness: none / present / overpowering.
- Aftertaste: short / pleasant / lingering and harsh.
Taste at three temperatures: hot (right after brew), warm (~60°C / 140°F), and near room temp. Flavors change as it cools and reveal sweetness and defects. Adjust the variable you changed based on these notes, then try another single change.
Troubleshooting Common Issues
Most brew problems come from grind size, water temperature, dose, or brew time. Small changes to one of these variables usually fixes the issue quickly.
Over-Extraction vs Under-Extraction
Over-extraction happens when your coffee tastes very bitter, dry, or hollow. This usually means your grind is too fine, your brew time is too long, or your water is too hot. Fix it by coarsening the grind one step, shortening the brew time by 10–20%, or lowering the water temperature to about 195–205°F (90–96°C).
Under-extraction tastes sour, thin, or fruity in a sharp way. This means your grind is too coarse, brew time is too short, or water is too cool. Make the grind finer by one step, increase contact time, or heat water into the 195–205°F range.
Quick checklist:
- Grind: finer → more extraction; coarser → less extraction.
- Time: longer → more extraction; shorter → less extraction.
- Temp: hotter → more extraction; cooler → less extraction.
Dealing with Bitterness
First, confirm bitterness is consistent across cups and not from old beans. Stale or oily beans can taste bitter. Use freshly roasted beans and store them in an airtight container away from light.
If beans are fresh, adjust grind and time. Make the grind coarser by one notch and shorten the brew time by 10–30 seconds, depending on method. For espresso, reduce dose by 0.5–1 gram or increase yield slightly to balance. For drip or pour-over, pour more slowly with a coarser grind or lower water temperature by a few degrees.
If bitterness persists, descale and clean your machine. Old oils and mineral buildup add harsh flavors. Clean brew baskets, shower screens, and any parts that contact water or coffee.
FAQS
What coffee beans should you start with?
Choose a medium-roast, single-origin or well-reviewed blend. They give balanced flavor and hide fewer roasting flaws than very dark or very light roasts.
How fine should you grind your beans?
Match grind size to your brew method: coarse for French press, medium for drip, and fine for espresso. A consistent grind helps extraction and flavor.
What coffee-to-water ratio should you use?
Try 1:15 to 1:17 (coffee grams : water grams). Start at 1:16 and adjust to taste—use more coffee for stronger cups and less for milder ones.
What water temperature works best?
Aim for 195–205°F (90–96°C). If you don’t have a thermometer, let boiling water sit 30 seconds before pouring.
How long should you brew?
Brew times vary: 4–5 minutes for French press, 2–4 minutes for pour-over, and 20–30 seconds for espresso. Timing affects strength and extraction.
How do you store coffee?
Keep beans in an airtight container, away from heat, light, and moisture. Buy small amounts and use within 2–3 weeks of opening.
Troubleshooting quick guide:
| Problem | Likely cause | Fix |
|---|---|---|
| Sour or weak | Under-extracted | Finer grind, longer brew, hotter water |
| Bitter or harsh | Over-extracted | Coarser grind, shorter brew, slightly cooler water |
| Flat taste | Stale beans | Buy fresher beans, store properly |
Can you use tap water?
Yes if it tastes good. Filtered water often improves flavor by removing chlorine and off-tastes.
How should you clean gear?
Rinse equipment after each use and deep-clean weekly. Oils and residue change flavor and clog filters.
Conclusion
You now have the basic tools to make better coffee at home. Focus on fresh beans, the right grind, correct water temperature, and a consistent coffee-to-water ratio.
Start simple and practice one method until you feel comfortable. Small changes to grind size or brew time can produce big differences in taste.
Keep notes on what you like and don’t like. A short log helps you repeat successes and avoid mistakes.
If you want to improve, invest in a grinder before a new brewer. Grinding fresh gives the biggest flavor boost for the money.
Use this quick checklist to guide your next brew:
- Fresh whole beans
- Proper grind for your method
- Clean equipment and good water
- Measured coffee-to-water ratio
- Controlled brew time and temperature
Try one change at a time. Taste, adjust, and enjoy the process of learning.